
A luxury you can easily add to your next
DIY bathroom Remodel.
One of the most luxurious parts of our master bathroom remodel is completely invisible. Aside from me telling you it existed, you likely wouldn’t even notice.
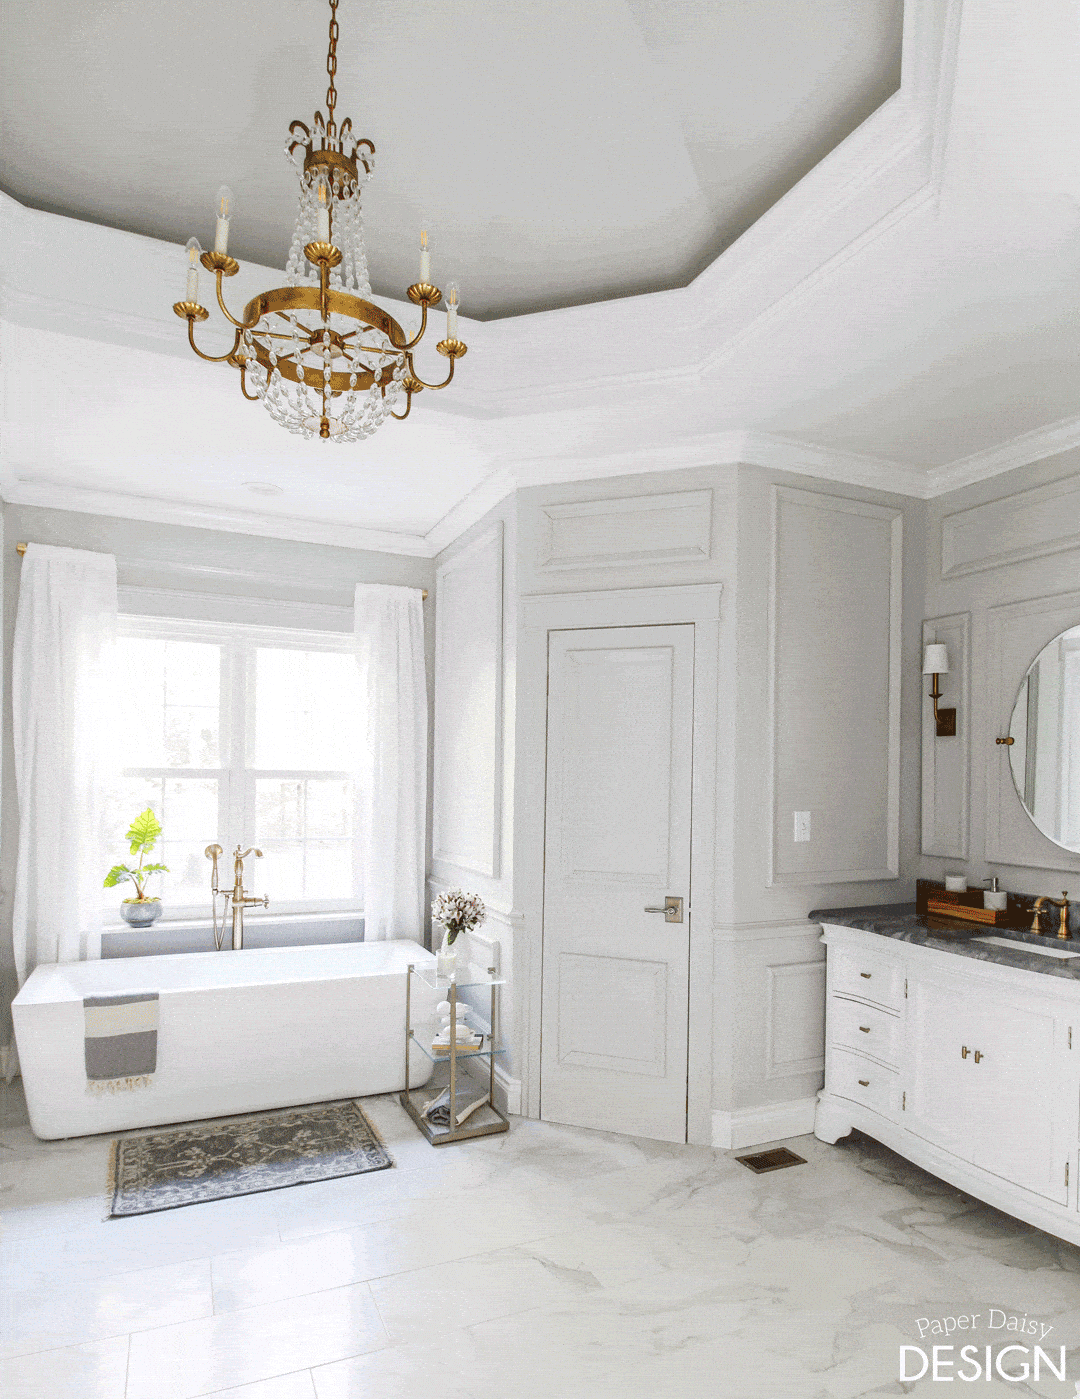
Unless of course, you were barefoot and then you would notice almost immediately.

Instead of the shock of a cold, tile floor they would be greeted with the warmth and comfort of our electric floor warming system. Underfloor heating is becoming increasingly popular here in America, and the UK. I’m going to go into detail below about how I got my underfloor heating here in America, but for my UK readers, you may need to read into UK Underfloor Heating on the internet to find the best way to go about fitting it.
This system is extremely DIY friendly and easy to install. Doing the installation yourself makes it an affordable upgrade for any bathroom remodel.
I partnered with South Cypress tile for my bathroom remodel. I was gifted
product in exchange for my honest opinion and review.
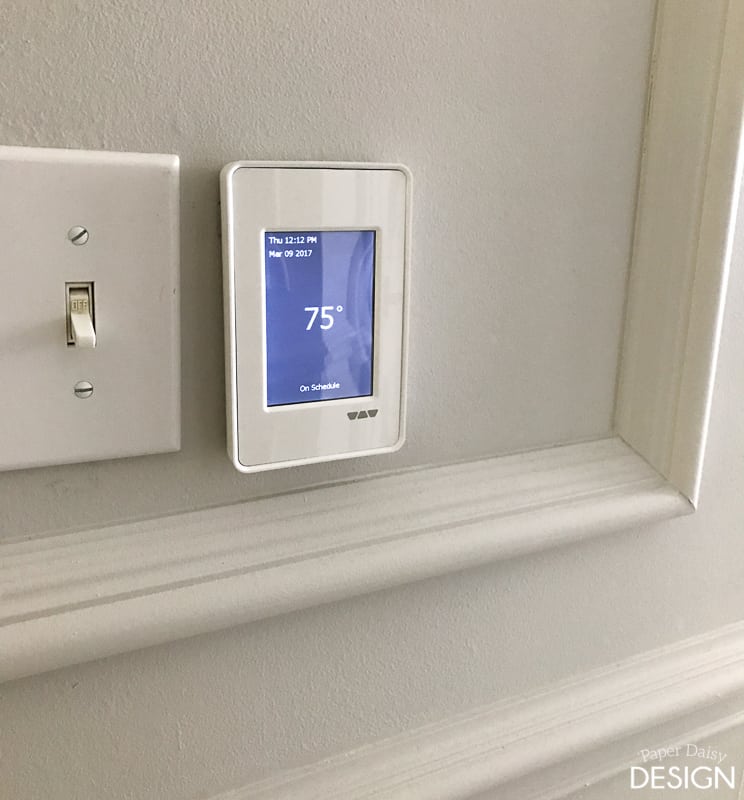
This is actually our second time installing the Schluter Ditra Heat Floor Warming System. Since our first installation just 2 years ago, they now offer an upgraded control panel with a sleek touchscreen design.
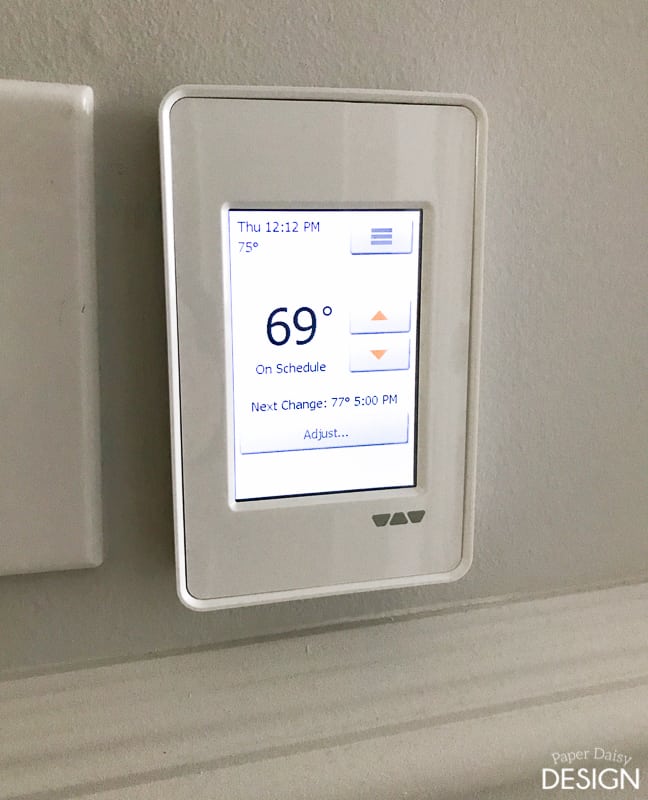
Here are the basic components of the system. Uncoupling membrane, heating cables, power modules and a thermostat control panel. As you order your system, you need to be as exact as possible for the amount of heating cable you will need. The length of the wire CAN NOT be altered.
While this is a DIY project, I highly recommend hiring a certified, electrician with knowledge of installing and testing this type of system. It does require testing by a special meter that may not be commonly used by someone with less training. In addition, this system requires a dedicated circuit to be added to your electrical panel which is best handled by a professional.

The uncoupling membrane is an essential aspect of the particular system. The membrane provides unparalleled support for your tiles, protecting your investment long-term. This prevents the stress tile can experience due to the expansion and contraction due to changes in humidity. The Schluter substrate and the tile can move independently, eliminating cracking and tile stress and providing waterproofing.
We found the protection from the movement benefit of the system to be of particular concern during our last bathroom renovation. We used Carrera marble tiles throughout the space which are much more susceptible to cracking than porcelain tile.
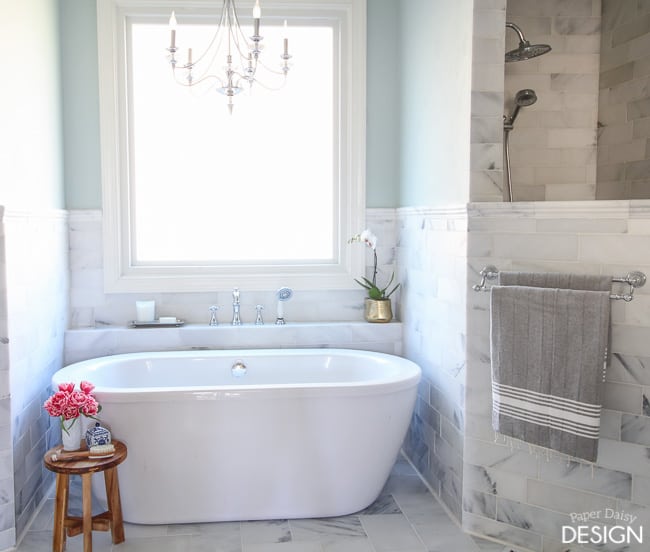

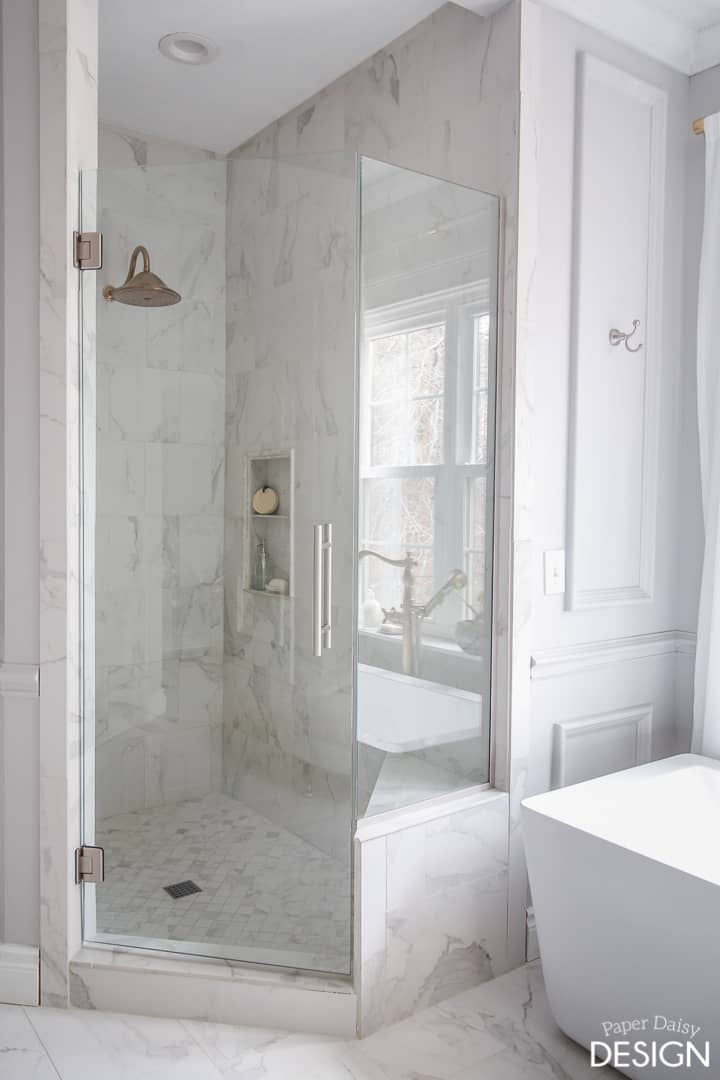
This time, we went with a beautifully honed marble-looking porcelain tile from South Cypress called Classico. I am still in love with the look of marble, obviously, but I was happy to have the durability and ease of care found in a porcelain tile.
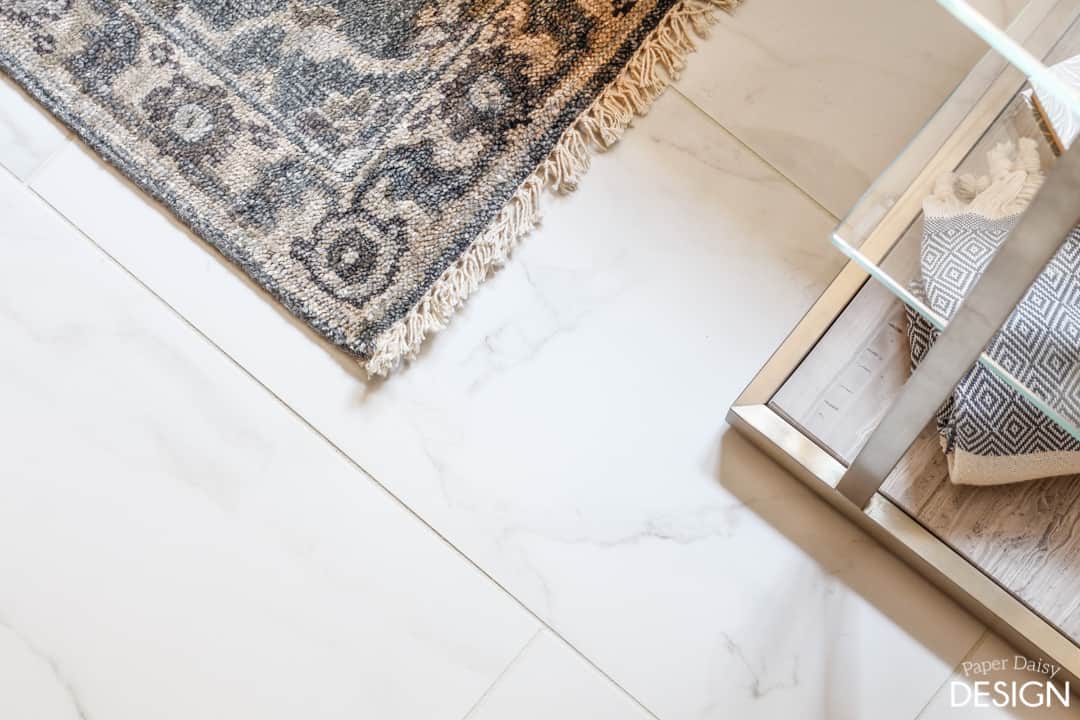
This tile looks just like Calcutta marble, much more so than any porcelain tile I have ever seen.
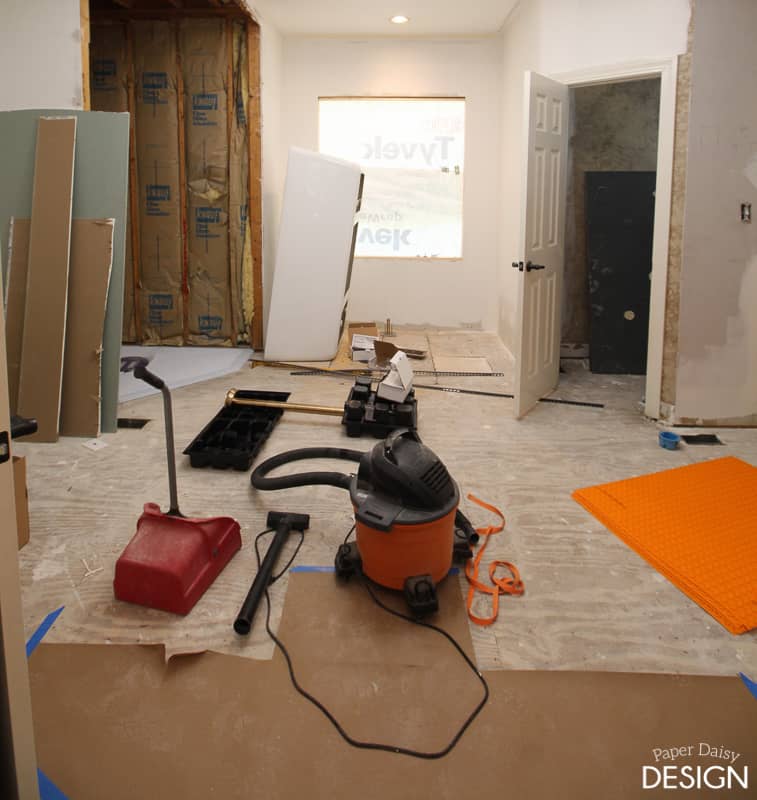
The first step is to have an electrician prepare your electrical panel for installation, which includes setting up a dedicated circuit to your electrical panel. The wires will also need to be tested before installation and after installation. Please follow the instructions provided in the kit.
Ditra Heat Installation
1. Start with a clean and level substrate. If any leveling is required, do so in advance. We had to do a bit of leveling in our last project. We used a leveling compound and allowed it to dry the required time before we began.
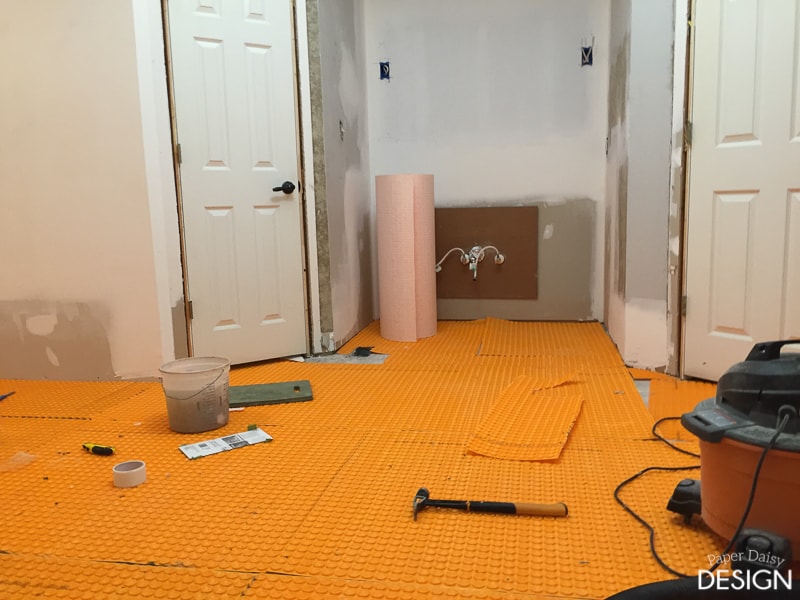
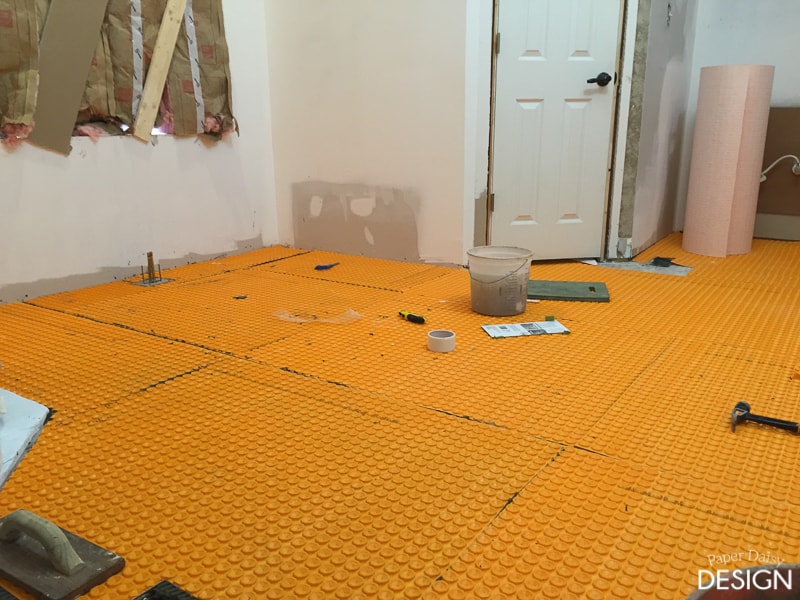
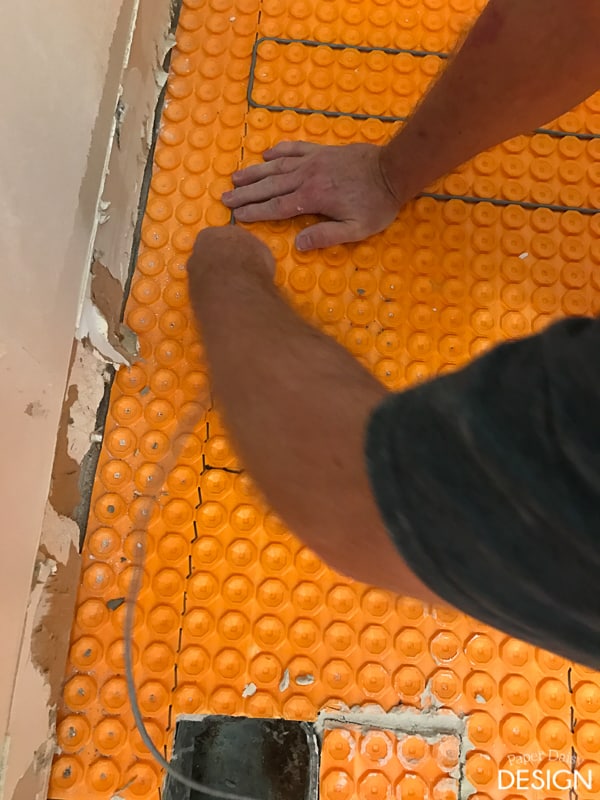
2. Cut the rolls or place the sheets of Ditra membrane to fit your room. You will be dry-fitting the entire space to be tiled. Be sure that the “lugs” or waffles of the membrane line up for ease of installation of the heating cables.
3. Mix thin-set and allow it to set up as directed 5-10 minutes. The consistency of the mortar for Ditra installation should be a little looser than what you would use for setting tile, but you still want it to hold a trowel notch. The best consistency comparison I could give is more like a thick pancake batter instead of creamy peanut butter. I often test the consistency while it is still in the bucket by running my finger through the mortar after is it is mixed. The side “walls” created by my finger indentation should fall in slowly.
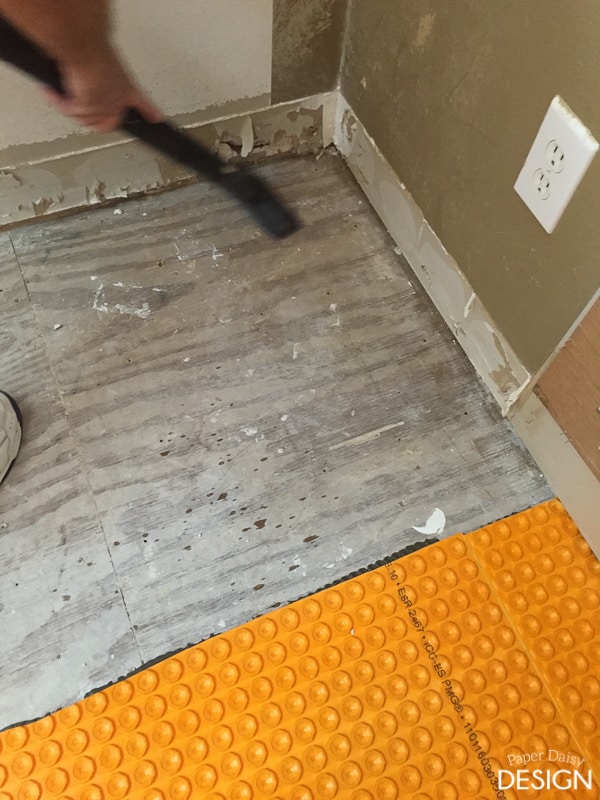
3. Remove sections of the Ditra membrane to apply the mortar. We typically found that even though we cleaned the room thoroughly before we began, each section benefited from an additional pass with a shop vacuum before installation.
2. Wipe floor, whether concrete or plywood, with a wet sponge. This primes the floor for the acceptance of the mortar and ensures that the moisture from the mortar is not consumed by the floor. It also removes any remaining dust.
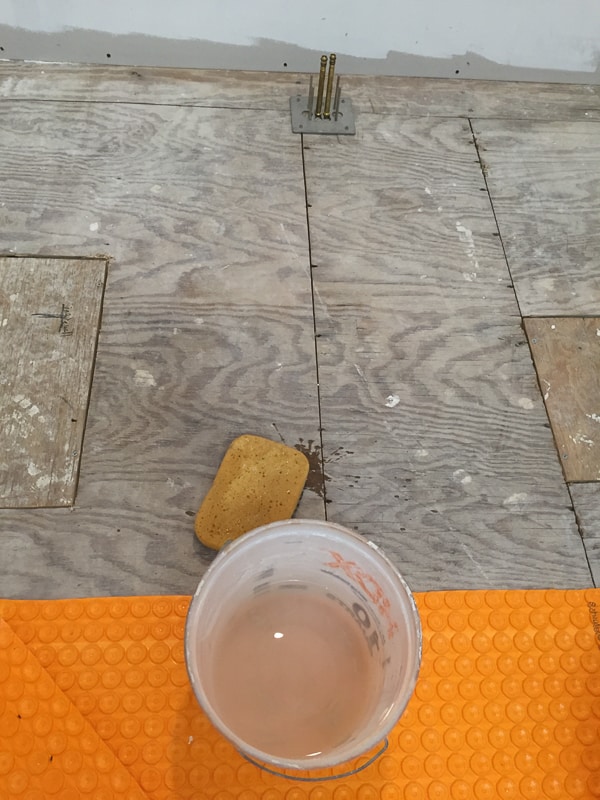
3. Spread the thin-set/mortar cover entirely the substrate with the flat side of the trowel. (If you are installing over plywood, you need to use modified thinset, for concrete, you will use unmodified thinset.)
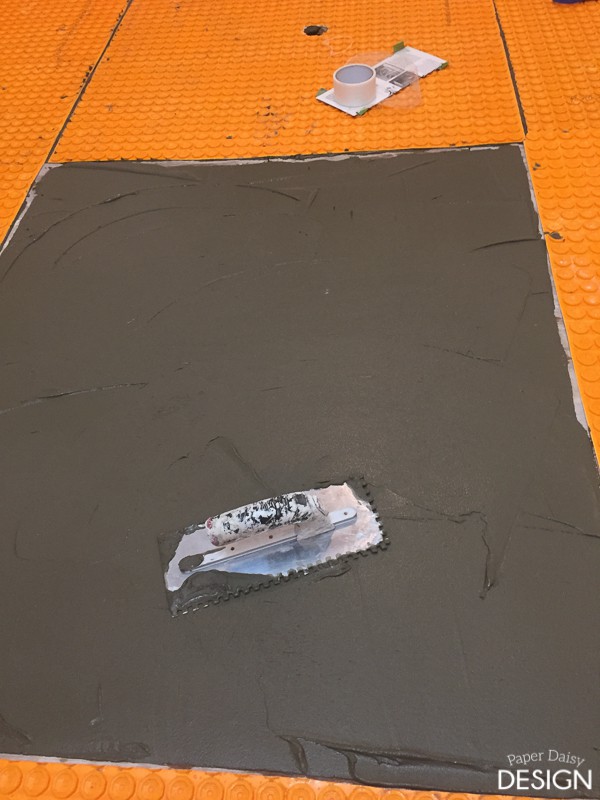
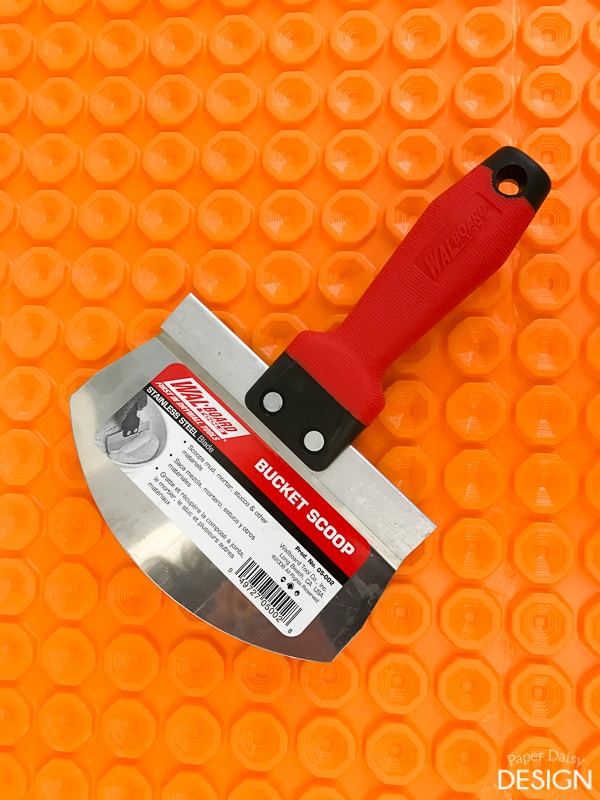
I like to use a bucket scoop to transfer the mortar to the floor.
4. Using a 1/4 notch trowel, create the notches to accept the membrane.
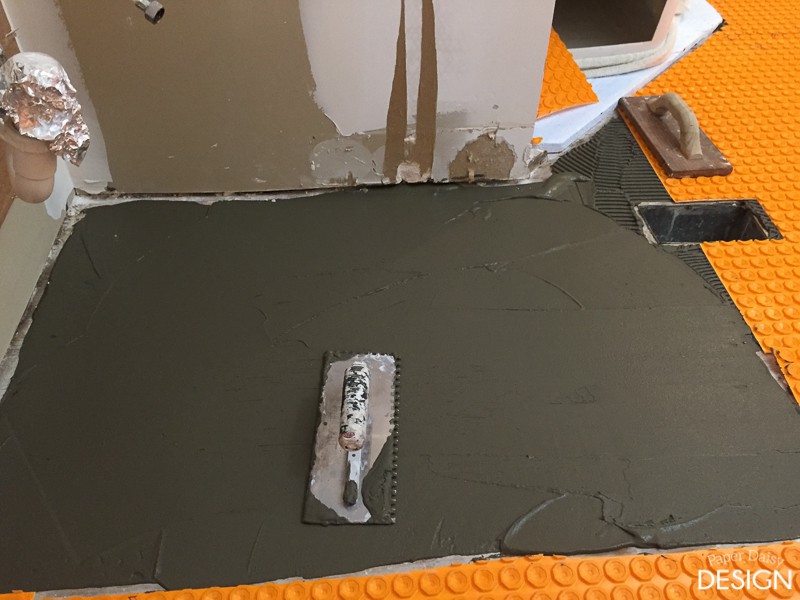
You can easily see on the left-hand side of the photo above the mortar consistency.
Here is another look with a white-based modified thin-set mortar.


The color difference was just a shift in product.
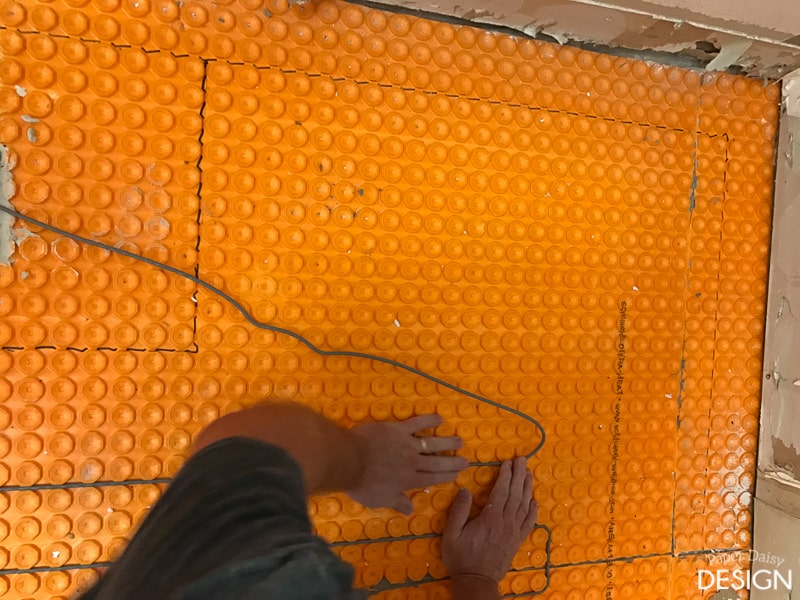
5. Embed Ditra membrane into the mortar by running a wooden float across the surface and edges.
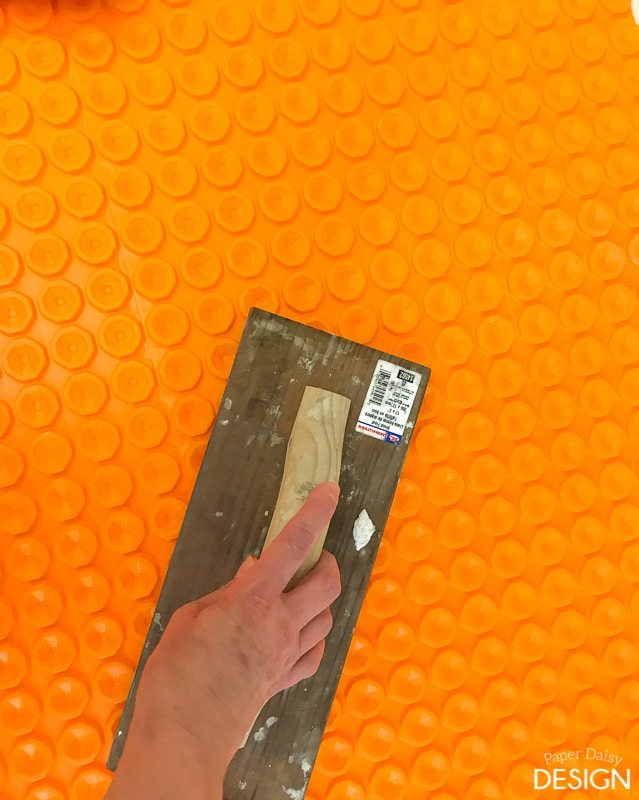
Repeat process, working in manageable sections around the room.
No need to be overly concerned if mortar seeps out of the edges of the seams. Eventually, the whole surface, including the “lugs” will need to be completely covered with thinset.
The most important part is to achieve full coverage and that all seams are flat. It is advisable to check the underside of the sheets to verify complete coverage often.
You can walk on the membrane immediately after applying.
6. Now it is time to start installing the heating cables. Be sure that your electrician has turned off the power to the dedicated circuit and that the cables and sensors have been appropriately tested with a meter. I For more specific information, please review the Schluter installation manual. Particular guidelines need to be followed for warranty coverage.
7. Cut a section of the Ditra membrane to allow the cold lead to conductor splice to sit flush under tile.
In the photo below, there are two of them covered in tape. (I can’t tell you why an extra space was cut out. I think it was moved so that we could quickly go to the right first instead of the left.
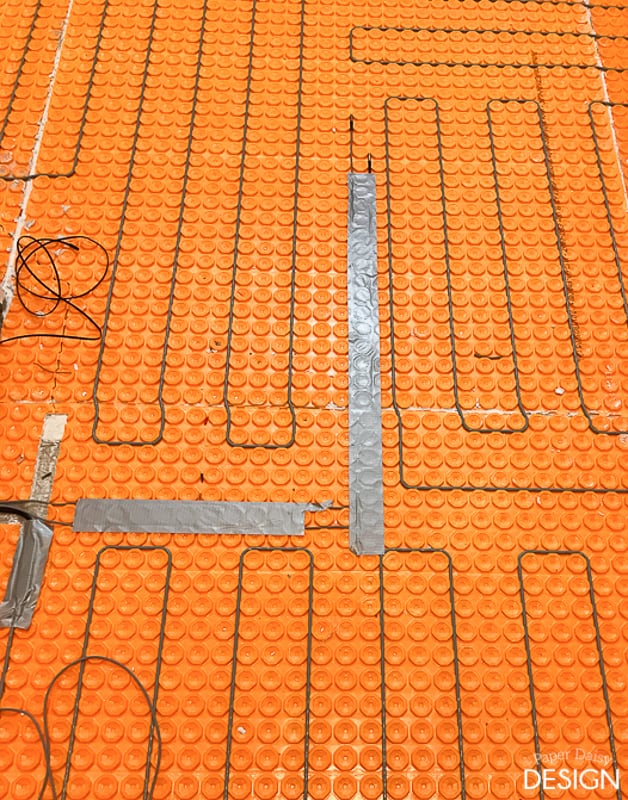
The long strip of duct tape was used to cover the sensor wire. We removed the tape once we applied mortar to the Ditra and installed the tile. It was just used to hold the wire in place temporarily.
8. Creating rows of cable, keep three inches from each cable and fixed elements like walls and vanities.
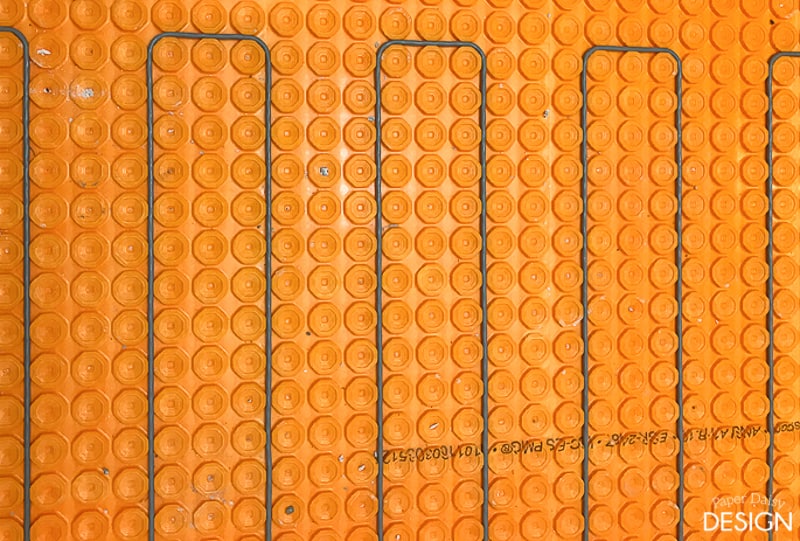
The cables snap in between the lugs very easily. They can also be removed it you need to reposition them.
The photo below is from our previous install. You can see the heating cable going over the shower curb to heat the shower floor. In hindsight, I would only do this if the shower is oversized.
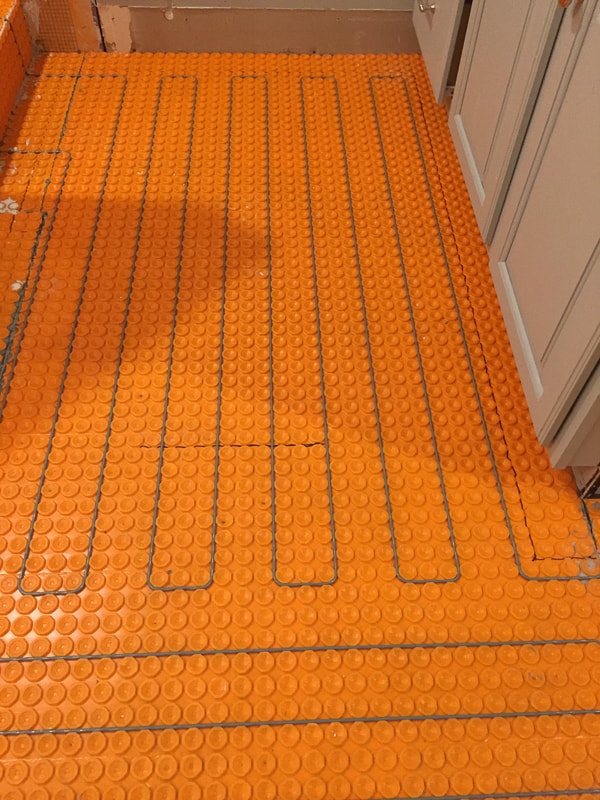
There are several additional steps and precautions for adding the heated elements to the shower. We chose to skip the installation of the heating cables in the shower this time and have no regrets. For reference, this is the size of our shower now.
9. Once the cable is run, it is time to have the electrician return to test all of the components again with the meter.
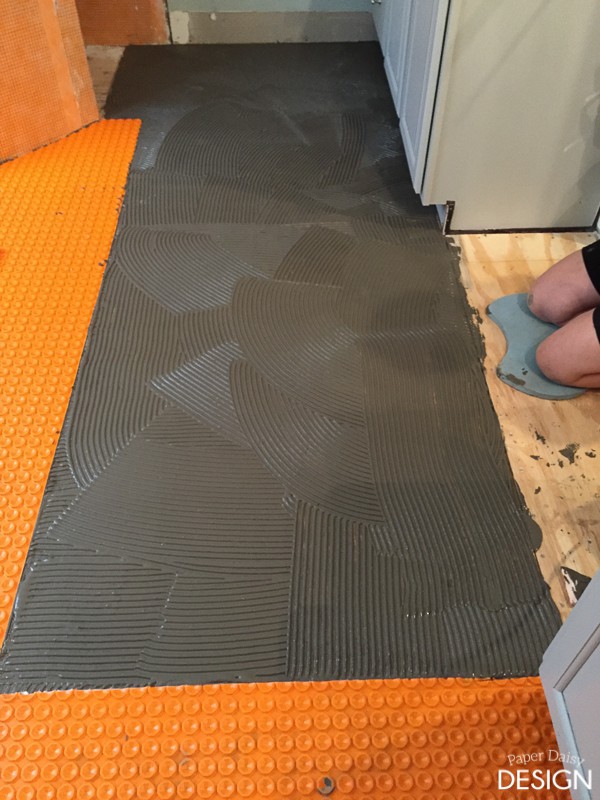
10. After all the cables and sensors have been tested, you can install the tile using unmodified thin-set mortar. The only difference between installing tile over the Ditra heat membrane is that all of the space between the lugs must be completely filled with mortar and then add more mortar to make your trowel notches for tile installation.
Here is a short video of that process and a few helpful tips.
Be sure to come back next week! I will discuss the most awesome leveling systems for large-format tiles. Using a leveling system prevents lippage while also properly spacing tiles. Lippage occurs when tiles are not level, which can be difficult to achieve with large format tiles.


4 Comments
Melanie Morgan
March 26, 2017 at 9:40 pmCan you tell me how you antiqued the hinges/wheels on the craft table? We are attempting to make this because I saw your post and fell in love with it but I haven’t found your instructions on that part yet…
Thanks in advance!!
Melanie
Leslie
April 4, 2017 at 7:34 amYou are right! I never did go back and do a tutorial. I probably need to do a whole “LOST Post” series again.
Here is a link to the product I used.
http://amzn.to/2o5xeSs
I’ll at least go add it to the tutorial so others can find it as well. It will scratch off the connectors so be sure to use a flat topcoat or be prepared to touch up with flat black paint after connecting it all. Once it was all together I haven’t had any problems.
The wheels did not need to have a finish they are a matte industrial black.
Paul Bigham
August 8, 2019 at 7:18 amGreat posts. Stunning, Thanks for the excellent outline
Mark
September 23, 2019 at 4:57 amI agree with you that people should always hire a professional, licensed electrician for home renovation projects.